
Learn how to record gameplay on PC using OBS Studio. Discover recording setup, video settings, audio configuration, screen capture, and tips for high-quality gaming videos.
How to Record Gameplay on PC
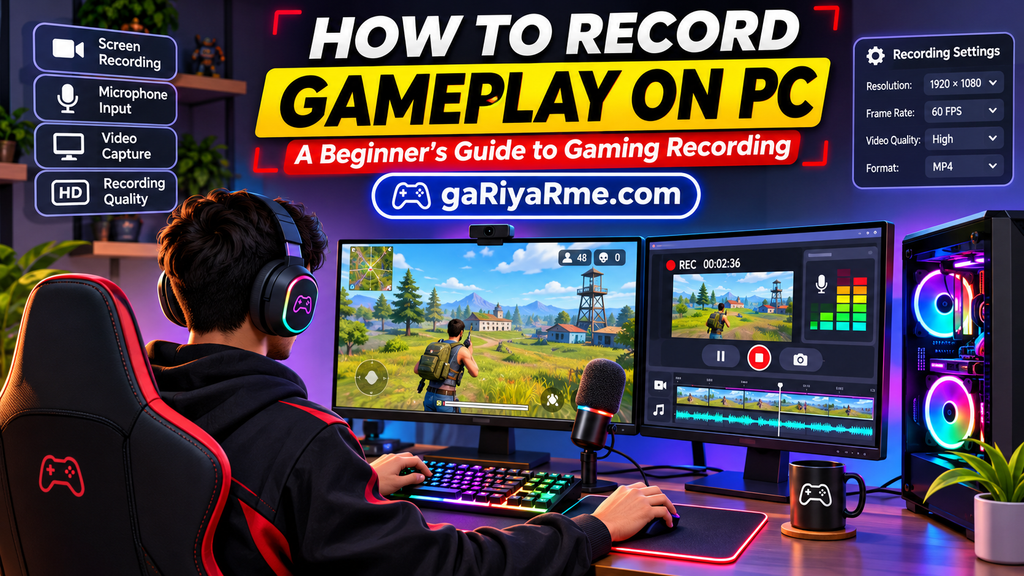
Recording gameplay on a PC is one of the first skills you need to learn when starting a gaming YouTube channel. Whether you want to upload complete gameplay videos, create gaming Shorts, record tutorials, or capture exciting gaming moments, good-quality footage is an important part of your content.
The good news is that you do not need an expensive recording setup to get started. You can record PC gameplay using free software such as OBS Studio, built-in Windows recording features, or recording tools provided by your graphics card.
However, simply pressing the record button is not enough. You also need to understand recording sources, resolution, frame rate, audio settings, video encoders, and file formats.
In this beginner-friendly guide, you will learn how to record gameplay on PC step by step, how to set up OBS Studio, how to capture game audio and microphone commentary, and how to troubleshoot common recording problems.
Whether you are a beginner gamer or an aspiring gaming content creator, this guide will help you start recording your gameplay.
What Do You Need to Record Gameplay on PC?
Before recording your first gaming video, prepare a few basic things.
You do not need a professional studio. A suitable PC, recording software, and enough storage space are enough to begin.
Basic Requirements
1. A Gaming PC or Laptop
Your computer should be capable of running the game and recording software at the same time.
The required hardware depends on the game, graphics settings, recording resolution, frame rate, and encoder you choose.
2. Gameplay Recording Software
You need software that can capture your game screen and save the recording as a video file.
Popular options include:
- OBS Studio.
- Windows Game Bar.
- NVIDIA recording tools, where supported.
- AMD recording tools, where supported.
3. Microphone or Headset (Optional)
If you want to explain your gameplay or communicate with viewers, use a microphone or headset.
You can also record gameplay without voice commentary.
4. Enough Storage Space
Gameplay recordings can become large, especially when recording at high resolution or frame rates.
Make sure your computer has enough free storage before starting a long recording session.
5. A Video Editing Application
After recording, you may want to edit your footage, remove unnecessary sections, add commentary, and prepare the final video for YouTube.
Choose the Right Gameplay Recording Software
There are several ways to record gameplay on a PC. The best option depends on your hardware, operating system, and recording requirements.
Here are some popular choices.
OBS Studio
<text> </text>
<text> </text>
OBS Studio is a free and open-source application for video recording and live streaming.
It allows you to capture:
- PC gameplay.
- Desktop screens.
- Individual application windows.
- Microphone audio.
- Desktop audio.
- Webcam footage.
- Multiple video sources in one scene.
It also provides control over recording resolution, frame rate, encoders, audio tracks, and output formats.
Best for: Gaming YouTubers, streamers, and creators who want flexible recording controls.
Official website: https://obsproject.com/
Windows Game Bar
Windows Game Bar is a built-in Windows feature that can record supported games and applications without installing separate recording software.
You can generally open it using the Windows + G keyboard shortcut.
Depending on your Windows version and settings, you can:
- Start or stop recording.
- Capture screenshots.
- Control microphone recording.
- View recording controls.
- Manage supported capture options.
The recording shortcut Windows + Alt + R can also be used on supported Windows configurations.
Best for: Beginners who want a simple way to capture gameplay without configuring many settings.
Official guide: https://support.microsoft.com/windows
NVIDIA Recording Tools
If your PC has a supported NVIDIA graphics card, NVIDIA’s recording features can help you capture gameplay.
Depending on your GPU, drivers, and installed NVIDIA application, available features may include:
- Manual gameplay recording.
- Instant Replay.
- Microphone capture.
- Gameplay highlights on supported titles.
Best for: Gamers who already use compatible NVIDIA hardware and want convenient gameplay recording.
Official website: https://www.nvidia.com/
AMD Recording Tools
AMD Software: Adrenalin Edition provides recording and capture features for supported AMD graphics hardware.
Depending on your hardware and software version, features may include:
- Gameplay recording.
- Instant Replay.
- Screenshot capture.
- Recording quality controls.
Best for: Gamers using compatible AMD Radeon graphics hardware.
Official website: https://www.amd.com/
Which Recording Software Should Beginners Choose?
| Software | Main Advantage | Suitable For |
|---|---|---|
| OBS Studio | Flexible recording controls | Gaming creators |
| Windows Game Bar | Simple built-in recording | Casual beginners |
| NVIDIA recording tools | Convenient GPU-based capture | Supported NVIDIA users |
| AMD recording tools | Integrated Radeon capture | Supported AMD users |
My recommendation: Start with OBS Studio if you want to develop a gaming content creation workflow. If you only need occasional gameplay clips, try your PC’s built-in recording features first.
How to Download and Install OBS Studio
OBS Studio is a useful starting point because it provides recording features without requiring a paid subscription.
Follow these steps to install it.
Step 1: Visit the Official Website
Open https://obsproject.com/.
Step 2: Download OBS Studio
Select the download option for your operating system. Choose the Windows version if you are using a Windows PC.
Step 3: Run the Installer
Open the downloaded installation file and follow the installation instructions.
Step 4: Open OBS Studio
After installation, launch the application.
Step 5: Run the Auto-Configuration Wizard
When OBS opens for the first time, you may see an Auto-Configuration Wizard.
Choose the option that prioritizes recording rather than streaming if your main purpose is to create gameplay videos.
The wizard can help select initial settings based on your computer’s capabilities.
You can also access it later through:
Tools → Auto-Configuration Wizard
For more information, visit the official OBS Quick Start Guide.
Set Up OBS Studio for Gameplay Recording
After installing OBS Studio, you need to prepare a scene and add your gameplay as a source.
OBS uses two important concepts:
Scenes: A scene is a collection of sources arranged together for recording or streaming.
Sources: Sources are the individual elements captured in a scene, such as a game window, microphone, webcam, or display.
Let’s configure a basic gameplay recording scene.
Step 1: Create a New Scene
Open OBS Studio.
Find the Scenes panel, usually located at the bottom-left of the interface.
- Click the plus (+) button.
- Enter a name such as
Gameplay Recording. - Confirm the new scene.
You can create separate scenes for gameplay, webcam commentary, tutorials, and other video formats.
Step 2: Add Game Capture
If you are using Windows, Game Capture is generally a useful option for capturing supported games.
Follow these steps:
- Open the Sources panel.
- Click the plus (+) button.
- Select Game Capture.
- Give the source a name.
- Choose the appropriate capture mode.
- Select your game if using a specific-window capture option.
- Confirm the settings.
If the game does not appear, try opening the game before configuring the source.
Game Capture is not available in the same way on every operating system. For other systems or unsupported games, you may need Window Capture or Display Capture.
Step 3: Understand Other Capture Sources
OBS provides different source types for different recording situations.
Game Capture: Captures supported games directly.
Window Capture: Captures a selected application window.
Display Capture: Captures an entire monitor.
Video Capture Device: Captures a webcam or supported video capture device.
For most beginner gaming recordings on Windows, try Game Capture first. If it does not work, test Window Capture or Display Capture.
Remember that Display Capture may also record notifications and other information visible on your screen.
Step 4: Adjust the Game Screen
After adding your source, check the OBS preview.
Make sure:
- The gameplay fills the canvas correctly.
- No important part of the game is cropped.
- The screen is not stretched.
- The game is visible at the expected resolution.
If necessary, right-click the source and use the available transform options to fit it to the canvas.
Configure OBS Video Settings
Video settings affect the resolution and smoothness of your gameplay recordings.
You can find the main video settings under:
Settings → Video
Base (Canvas) Resolution
The Base Resolution represents the working canvas size in OBS.
It should generally match the resolution you want to capture or arrange your sources around.
For example, if you play and record at 1920 × 1080, you can begin with a 1920 × 1080 canvas.
Output (Scaled) Resolution
Output Resolution determines the resolution of the recorded video.
Common options include:
- 1920 × 1080 (1080p).
- 1280 × 720 (720p).
- 2560 × 1440 (1440p), if your setup supports it.
If your computer struggles during recording, reducing the output resolution may improve performance.
Frame Rate (FPS)
FPS means frames per second.
Common recording options include:
- 30 FPS.
- 60 FPS.
For many gaming videos, 60 FPS can provide smoother motion, especially in fast-paced games.
However, 30 FPS may be more suitable for lower-powered computers or games where smooth high-frame-rate footage is not essential.
Downscale Filter
If your output resolution is lower than your base resolution, OBS can use a downscale filter.
Choose an appropriate filter based on the quality and performance your system can handle.
Beginner recommendation: Start with 1920 × 1080 at 30 FPS if your PC is not powerful. If recording runs smoothly, test 60 FPS.
Configure Recording Output Settings
Recording Output settings determine how OBS saves your gameplay videos.
Open:
Settings → Output
You can use Simple or Advanced Output Mode.
For beginners, Simple Mode is a good starting point.
Recording Path
Choose where your recorded gameplay files will be saved.
For example, create a folder called:
Gaming Recordings
Keeping recordings in one organised folder makes them easier to locate and edit.
Recording Quality
OBS provides recording quality options in Simple Output Mode.
These may include:
- Same as stream.
- High Quality, Medium File Size.
- Indistinguishable Quality, Large File Size.
- Lossless Quality, Tremendously Large File Size.
For beginners, High Quality or Indistinguishable Quality can be useful starting points, depending on your available storage and computer performance.
Avoid selecting Lossless Quality without understanding its storage requirements. It can generate extremely large files.
Recording Format: MKV or MP4?
OBS supports different recording formats.
Two common options are MKV and MP4.
MKV: A useful recording format because an unexpected interruption is less likely to make the entire recording unusable.
MP4: A widely supported format for video editing and sharing.
OBS recommends MKV for many standard recording workflows because it is more resilient if recording does not stop normally.
You can convert an MKV recording into MP4 using OBS’s built-in remux feature.
To do this:
- Open OBS Studio.
- Select File.
- Choose Remux Recordings.
- Select your MKV file.
- Choose the destination and start remuxing.
Remuxing changes the container without requiring a full video re-encode.
Official guide: https://obsproject.com/kb/standard-recording-output-guide
Choose the Right Video Encoder
A video encoder processes your gameplay footage and prepares it for saving.
OBS may offer different encoders depending on your computer hardware and software configuration.
Common options include:
Hardware Encoders: These use supported hardware on your graphics card or other dedicated processing hardware.
Examples may include:
- NVIDIA NVENC.
- AMD hardware encoding.
- Intel Quick Sync Video.
Software Encoder: x264 uses your CPU to encode video.
Hardware vs Software Encoding
Hardware encoding can reduce the amount of CPU work needed for recording, depending on the encoder and system configuration.
Software encoding may provide additional control but can use more CPU resources.
For many gaming PCs, a compatible hardware encoder is a good first option to test.
However, no encoder is automatically best for every computer. Test different available options and check whether gameplay performance remains smooth.
Set Up Microphone and Game Audio
Good audio is just as important as good video.
If you plan to create gaming tutorials, commentary videos, or live streams, you should configure your microphone and game audio correctly.
Configure Desktop Audio
Desktop Audio captures sound coming from your PC, including supported game audio.
In OBS, open:
Settings → Audio
Choose the appropriate desktop audio device.
Configure Microphone Audio
Select your microphone or headset under the Mic/Auxiliary Audio section.
You can also add a separate Audio Input Capture source if you want more control over a particular microphone.
Check the Audio Mixer
After configuring your devices, return to the main OBS window.
Look at the Audio Mixer.
When you play a game or speak into your microphone, the corresponding volume meters should move.
If they do not move:
- Check whether the correct device is selected.
- Check the microphone connection.
- Verify operating system microphone permissions.
- Make sure the device is not muted.
- Check the application volume settings.
Balance Game Audio and Voice Commentary
If you are recording gameplay with commentary, avoid making the game sound too loud compared with your voice.
Record a short sample and listen using headphones.
Make sure:
- Your voice is clear.
- Game audio is audible.
- There is no distracting background noise.
- Audio is not distorted or clipping.
You can also use separate audio tracks in Advanced Output Mode if your editing workflow requires separate control over microphone and game audio.
How to Record Gameplay on PC Using OBS Studio
Once your scenes, sources, video settings, and audio devices are ready, you can record gameplay.
Follow these steps:
- Open OBS Studio.
- Select your gameplay scene.
- Open your game.
- Check the OBS preview.
- Confirm that game audio and microphone meters are working.
- Click Start Recording.
- Switch to your game and begin playing.
- Complete your gameplay session.
- Return to OBS Studio.
- Click Stop Recording.
Your recording will be saved in the folder selected under Recording Path.
Check Your First Recording
Do not immediately record a long gameplay session.
First, record a short test video.
Play it back and check:
- Is the game screen visible?
- Is the video smooth?
- Is the resolution correct?
- Is game audio recorded?
- Is microphone audio recorded?
- Is the file saved correctly?
- Does the recording play without problems?
Once everything works properly, you can begin recording longer sessions.
How to Record Gameplay Without OBS Studio
If OBS Studio feels complicated, you can try simpler recording methods.
Using Windows Game Bar
For supported Windows systems:
- Open the game you want to record.
- Press
Windows + Gto open Game Bar. - Check the available capture controls.
- Adjust microphone recording if required.
- Press
Windows + Alt + Rto start recording. - Press the shortcut again to stop recording.
The captured video is generally saved in the Windows Videos → Captures folder.
The exact available options depend on your Windows version, device, and application.
Using NVIDIA Recording Features
If your computer supports NVIDIA recording features:
- Open the relevant NVIDIA application or overlay.
- Check whether recording is available.
- Configure microphone and recording preferences.
- Start recording or enable an available replay feature.
- Save the gameplay clip.
Using AMD Recording Features
If you use supported AMD Radeon hardware:
- Open AMD Software: Adrenalin Edition.
- Find the recording and capture controls.
- Configure available recording options.
- Start capturing gameplay.
- Save and review the recording.
Always download recording software and drivers from official websites.
How to Record Gameplay Without Lag
One of the most common problems for gaming creators is lag during recording.
Your game may run smoothly before recording but start stuttering when the recording software is active.
This can happen because recording uses additional system resources.
Try these solutions.
Reduce Game Graphics Settings
Lower demanding graphics settings if your PC struggles to run the game and recording software simultaneously.
Use Hardware Encoding
If a compatible hardware encoder is available, test it instead of using CPU-based encoding.
Reduce Recording Resolution
If recording at 1080p or higher causes problems, try a lower output resolution.
Adjust Frame Rate
Test 30 FPS if 60 FPS recording is causing performance issues.
Close Unnecessary Applications
Close programs that consume significant CPU, GPU, memory, or disk resources.
Check Storage Performance
Make sure your recording drive has enough free space and can write files at the required speed.
Avoid Overloading OBS with Sources
Use only the sources you need. Multiple browser sources, video layers, filters, and other elements can add extra workload.
Test Different Settings
There is no universal configuration for every PC. Make small changes and record short test clips to identify the best balance between recording quality and performance.
How to Record Gameplay with a Webcam
Some gaming creators prefer showing their faces while playing.
A webcam can make commentary videos, reactions, and live streams more personal.
To add a webcam in OBS:
- Open your gameplay scene.
- Go to the Sources panel.
- Click the plus (+) button.
- Select Video Capture Device.
- Choose your webcam.
- Adjust the webcam resolution and frame rate if available.
- Resize and position the webcam in the preview.
You can place the webcam in a corner of the gameplay screen.
Make sure it does not cover important game information.
A webcam is optional. You can create successful gaming content without showing your face.
Organise Your Gameplay Recordings
Recording gameplay regularly can quickly create many large video files.
Good file organisation helps you find footage when editing.
Create folders such as:
- Raw Gameplay.
- Edited Videos.
- Gaming Shorts.
- Audio Recordings.
- Thumbnails.
- Published Videos.
Use descriptive file names.
For example:
Free-Fire-Gameplay-Highlights-01
Battle-Royale-Beginner-Guide-01
Gaming-Challenge-Recording-01
You can also organise recordings by game name and recording date.
Avoid deleting your original recordings until you are confident that your final video and any important backup files are safe.
How to Prepare Recorded Gameplay for YouTube
Recording is only the first stage of gaming video production.
Before publishing, you may need to edit your footage.
A basic workflow includes:
Step 1: Review the Recording
Watch the footage and identify the most useful or entertaining moments.
Step 2: Remove Unnecessary Sections
Cut long waiting periods, repeated mistakes, and unrelated footage.
Step 3: Add Commentary or Captions
Include explanations, voiceovers, or captions where they improve the video.
Step 4: Adjust Audio
Make sure game sound and microphone audio are balanced.
Step 5: Export the Video
Choose an export resolution and format suitable for your intended platform and editing workflow.
Step 6: Prepare the Thumbnail and Title
Create an accurate title and an attractive thumbnail that communicates the video topic.
For more help with thumbnails, read our guide: AI Gaming Thumbnails for YouTube.
If you need inspiration for what to record, explore Gaming Video Ideas for Beginners.
Common Gameplay Recording Problems and Solutions
Here are some common problems beginners may experience.
OBS Is Not Capturing the Game
Possible solutions:
- Check whether the correct game is selected.
- Try running the game before adding Game Capture.
- Check the capture mode.
- Test Window Capture or Display Capture.
- Check whether the game and OBS are running with compatible permissions.
Black Screen in Game Capture
This can happen because of compatibility, capture settings, or graphics configuration.
Try:
- Recreating the Game Capture source.
- Selecting the correct game window.
- Updating graphics drivers.
- Testing another capture method.
- Checking the OBS troubleshooting documentation.
Microphone Is Not Recording
Check the selected microphone device, connection, mute status, and operating system permissions.
Also verify the microphone meter in the OBS Audio Mixer.
Game Audio Is Missing
Check Desktop Audio configuration and ensure that the correct output device is selected.
Recording Is Choppy
Reduce the output resolution or frame rate, test a different encoder, and close unnecessary applications.
Recording File Is Too Large
Reduce recording quality or resolution if appropriate.
You can also avoid unnecessarily long recordings and delete unwanted files after making sure important footage is backed up.
Recording Is Not Saving
Check the selected Recording Path, available disk space, and folder permissions.
Also make sure you stop recording normally before closing OBS.
Tips for Better Gameplay Recording
Follow these practical tips to improve your gaming recordings.
- Record a short test before every important session.
- Check your microphone and game audio.
- Choose a resolution your PC can handle.
- Use a suitable recording frame rate.
- Keep enough free storage space.
- Organise your recording files.
- Avoid unnecessary background applications.
- Record gameplay in a well-planned session.
- Keep your game and recording software updated.
- Review the final footage before editing.
Most importantly, focus on recording footage that supports your video idea. A useful tutorial, entertaining challenge, or interesting gameplay highlight is more valuable than hours of unedited footage.
Learning how to record gameplay on PC is an important step for anyone who wants to become a gaming content creator.
You do not need an expensive setup or advanced technical knowledge to begin. Start with OBS Studio or a built-in recording tool, configure basic video and audio settings, and record a short test session.
Once your setup works properly, experiment with different recording formats, gameplay styles, commentary, and editing techniques.
As your channel grows, you can improve your equipment and develop a more advanced recording workflow.
Remember, good gaming content begins with useful ideas, clear footage, and consistent improvement.
Set up your recorder, capture your gameplay, and start creating.
Frequently Asked Questions (FAQ)
1. How do I record gameplay on PC?
You can record PC gameplay using OBS Studio, Windows Game Bar, or compatible NVIDIA and AMD recording tools. Install or open your preferred software, select the game capture source, configure audio and video settings, and start recording.
2. What is the best free software to record PC gameplay?
OBS Studio is one of the most flexible free options for PC gameplay recording. It supports game capture, desktop capture, microphone audio, webcam sources, and custom recording settings.
3. Is OBS Studio good for recording gaming videos?
Yes. OBS Studio is suitable for recording gameplay videos, tutorials, highlights, and other gaming content. It offers flexible control over scenes, sources, audio, resolution, frame rate, and recording formats.
4. Can I record gameplay on PC without a capture card?
Yes. If you are playing games directly on your PC, you can usually record them using software such as OBS Studio or supported built-in recording features. A capture card is generally used when capturing video from an external device such as a console.
5. How can I record gameplay without lag?
Try using a compatible hardware encoder, reducing game graphics settings, lowering recording resolution or FPS, closing unnecessary applications, and checking storage performance. Test different settings to find what works for your PC.
6. Should I record gameplay in 1080p or 720p?
Choose a resolution based on your monitor, game, computer performance, and content requirements. 1080p is a useful target for many gaming videos, while 720p can be a practical option for lower-powered systems.
7. Is 30 FPS or 60 FPS better for gameplay recording?
60 FPS can provide smoother footage, especially for fast-paced games. However, 30 FPS may be sufficient for some videos and can reduce system workload. Choose the frame rate your PC can record reliably.
8. Should I use MKV or MP4 in OBS Studio?
MKV is recommended for many OBS recording workflows because it is more resilient if recording is interrupted unexpectedly. You can use OBS’s built-in Remux Recordings feature to convert MKV files into MP4 when needed.
9. How do I record game audio and microphone audio together?
Configure Desktop Audio and Microphone/Auxiliary Audio in OBS Studio. Check the Audio Mixer to confirm that both audio meters respond before recording.
10. Can I record gameplay without showing my face?
Yes. You can record gameplay without a webcam. Many gaming creators publish gameplay footage, tutorials, highlights, and commentary videos without showing their faces.
11. Where does OBS save gameplay recordings?
OBS saves recordings in the folder selected under Settings → Output → Recording Path. You can change this location to any suitable folder with sufficient storage space.
12. Can I use OBS Studio to record and stream at the same time?
Yes. OBS Studio supports recording and live streaming. However, doing both simultaneously can increase system resource usage. Test your PC performance and settings before using both features together.
13. Do I need a microphone to record gameplay?
No. A microphone is optional. You can record gameplay with game audio only, or add microphone commentary if it suits your content style.
14. How do I record gameplay for YouTube Shorts?
Record your gameplay, select interesting moments, and edit them into a vertical short-form video. Plan the framing carefully so that important gameplay elements remain visible in the vertical layout.
Leave a Reply