
Learn Free Fire map awareness for beginners. Understand the mini-map, sound cues, safe zone, enemy indicators, positioning, and smarter rotations.
Free Fire Map Awareness Guide for Beginners
Map awareness is an important skill in Free Fire. It helps you understand where you are, recognize potential threats, plan your movement, and decide when to approach or avoid a fight.
Many beginners focus mainly on aiming and eliminating opponents. However, even a player with good aim can struggle if they ignore the mini-map, move into an unsafe area, or fail to notice useful information around them.
Learning map awareness can help you make more informed decisions throughout a match. You do not need to memorize the entire map immediately. Start by understanding the mini-map, checking the safe zone, paying attention to available sound cues, and planning your next move.
In this Free Fire Map Awareness Guide for Beginners, you will learn how to read the mini-map, recognize useful indicators, move between locations, and develop better awareness during solo and squad matches.
What Is Map Awareness in Free Fire?
Map awareness means understanding your surroundings and using available information to make better gameplay decisions.
In Free Fire, this includes paying attention to:
- Your current location and nearby areas.
- The mini-map and the larger map.
- The safe zone and its movement.
- Available visual indicators and sound cues.
- Buildings, obstacles, and possible cover.
- Your teammates’ positions in squad matches.
- Routes that may help you move safely.
Map awareness does not mean knowing the exact location of every opponent. Some information may be incomplete, delayed, or unavailable. The goal is to use what you can observe without making unsupported assumptions.
1. Learn to Read the Mini-Map
The mini-map is one of the most useful tools for understanding your surroundings. Instead of relying entirely on what appears directly in front of your character, make a habit of checking the mini-map regularly.
Check Your Current Position
Begin by learning where your character is located in relation to nearby buildings, roads, terrain, and other visible map features.
When you enter an unfamiliar area, briefly check the larger map if needed. Identify your current position and consider where you want to move next.
This simple habit can help you avoid wandering without a clear destination.
Look for Relevant Indicators
Depending on the current game mode and version, the mini-map may display information such as your position, safe-zone boundaries, teammates, or certain combat-related indicators.
Learn what the available symbols mean in your current version of Free Fire. Do not assume that every symbol indicates an enemy or that every opponent will appear on the mini-map.
When an indicator appears, consider what it actually tells you and whether you need to change your movement or positioning.
Avoid Staring at the Map
Checking the mini-map is useful, but looking at it continuously can distract you from nearby threats.
Use brief checks while moving between safe points, after reaching cover, or when planning your next rotation. Return your attention to the gameplay view so you can react to what is happening around your character.
2. Understand the Safe Zone
The safe zone influences where you can move and how long you can remain in a particular area. Ignoring it can force you into a rushed journey or expose you to damage outside the playable area.
Check the Zone and Timer
Make a habit of checking the map and the available zone timer.
Ask yourself three questions:
- Am I already inside the safe zone?
- How much time do I have before I need to move?
- Which route could take me toward safety without unnecessary exposure?
These checks are especially important when you are collecting loot or fighting far from the safe area.
Start Moving Early
If you are far from the safe zone, consider moving before the situation becomes urgent.
Do not spend too long searching buildings for extra items when you already have enough equipment to continue. A useful item may not be worth delaying your rotation.
The right timing depends on your distance, available routes, current zone phase, and the threats around you.
For more general survival advice, read our guide on how to survive longer in Free Fire.
3. Pay Attention to Sound Cues
Sound can provide useful information about events happening outside your immediate field of view.
Depending on the situation and available audio settings, you may hear footsteps, gunfire, vehicles, or other gameplay sounds.
Do Not Treat Every Sound as an Exact Location
Sound can help you form an idea of what may be happening, but it does not always reveal an opponent’s exact position.
The direction and clarity of a sound may be affected by the environment, your audio setup, other sounds, and your own movement.
When you hear something important:
- Pause briefly if your current position allows it.
- Look toward the possible source.
- Check nearby cover and movement routes.
- Consider whether the sound suggests danger or an opportunity.
- Avoid rushing toward it without assessing the situation.
For example, distant gunfire may indicate activity in another area. It does not automatically mean you should move toward that fight.
Use Headphones if Comfortable
Headphones may make it easier to distinguish certain in-game sounds, depending on their quality and your audio settings.
However, equipment alone will not replace awareness. Practice interpreting the sounds available to you and combine them with visual information.
4. Watch Your Surroundings While Moving
Map awareness is not limited to the mini-map. You also need to observe the environment directly.
When moving through a building, road, open field, or unfamiliar area, look for useful cover and possible approaches.
Check Before Crossing Open Ground
Before crossing an exposed area, identify where you want to go next.
Consider whether there is a wall, rock, building, or another obstacle that could provide cover. If several routes are available, choose one that fits the current situation.
Avoid running through a long open area simply because it is the shortest path. A more protected route may offer better options, although no route is completely safe.
Notice Buildings and Terrain
Buildings, elevated terrain, walls, and other environmental features can affect visibility and movement.
As you become familiar with the map, learn which areas offer cover, which paths leave you exposed, and where you can change direction if necessary.
Do not assume that every elevated position is automatically better. A location is useful only if it fits your current zone, available cover, escape routes, and likely threats.
5. Learn to Recognize Potential Enemy Indicators
Free Fire may provide visual or audio information that helps you understand combat activity. The exact indicators and their behavior can depend on the current version, mode, equipment, and in-game mechanics.
Understand What an Indicator Means
If a combat-related indicator appears, do not immediately assume that it gives you a permanent or exact enemy location.
Instead, ask:
- What information does this indicator actually provide?
- Could the opponent have moved since it appeared?
- Is there another source of information that supports my interpretation?
- Would moving toward that area expose me to unnecessary danger?
Learning to interpret information correctly is more useful than reacting to every signal without thinking.
Avoid Predicting Too Much
If you hear gunfire or notice activity nearby, you may be able to estimate that an encounter is taking place. You usually cannot know everything about that encounter from one clue.
Use indicators as clues rather than guarantees. Keep your movement flexible and be prepared to reassess your decision when new information appears.
6. Plan Your Route Before Moving
A good rotation is a planned movement from one location to another, often to reach the safe zone or improve your position.
Before leaving your current location, identify your destination and consider the route.
Choose a Practical Destination
Do not move without a reason. Your destination might be a safer area, useful cover, a route toward the zone, or a position that allows you to observe the surroundings.
Consider whether the destination provides enough room to move again if the situation changes.
Keep an Alternative Route in Mind
Your first route may become unsafe if you notice an opponent, hear nearby combat, or discover that the area is exposed.
When possible, identify another way to move before leaving cover. Having an alternative can help you respond without making a rushed decision.
Avoid Unnecessary Detours
Looting can be useful, especially early in a match. However, detours may cost time and pull you away from the safe zone or a useful position.
Before entering another building, consider whether the equipment you might find is worth the time and risk.
7. Use Map Awareness to Decide When to Fight
Map awareness helps you evaluate whether an engagement is sensible.
Before approaching an opponent, consider your position, equipment, health, available cover, and escape options.
Avoid Following Every Opponent
If an opponent moves away, chasing them may lead you into an exposed area or away from the safe zone.
Consider whether you have a clear advantage and whether the pursuit offers a meaningful benefit. If not, maintaining a useful position may be the better choice.
Reassess After a Fight Begins
The situation can change quickly once combat starts. Another opponent may approach, your cover may become less useful, or you may need to move toward the safe zone.
Do not focus so heavily on the opponent in front of you that you forget everything else happening around you.
For additional survival strategies, see our Free Fire beginner survival guide.
8. Improve Awareness in Squad Matches
In squad matches, map awareness also includes understanding your teammates’ positions and coordinating movement.
Keep Track of Your Team
Check teammate indicators when available and avoid moving so far away that your squad cannot reasonably support you.
This does not mean every player must stand together at all times. Spacing can be useful, but teammates should understand the plan and remain aware of each other’s positions.
Communicate Useful Information
When communication tools are available, share information that helps your team make decisions.
Useful information may include:
- A visible opponent or a possible threat.
- The direction of nearby combat.
- A planned route toward the safe zone.
- A position that offers useful cover.
- A need to regroup or change direction.
Keep callouts brief and specific. Avoid claiming that an opponent is in an exact location unless you have reliable information.
Do Not Follow Teammates Blindly
Teammates can make mistakes too. If the squad is moving toward an exposed route or ignoring the safe zone, communicate your concern when possible.
The goal is to coordinate decisions, not simply copy every movement without understanding the situation.
9. A Simple Daily Map Awareness Practice Routine
You can develop better map awareness by practicing a few habits during regular gameplay. You do not need a separate, complicated routine.
Try this optional checklist during your next few matches.
Before leaving your landing area
- Check your position on the map.
- Identify a practical destination.
- Notice the direction of the safe zone.
While moving
- Briefly check the mini-map when appropriate.
- Observe nearby cover and open areas.
- Listen for useful sound cues.
- Keep an alternative route in mind.
Before fighting
- Consider where the opponent may be.
- Check your health, equipment, and position.
- Look for nearby cover and possible escape routes.
- Decide whether the fight is worth taking.
After a fight
- Check your surroundings before collecting items.
- Review the safe-zone timer.
- Decide whether to stay, move, or regroup.
- Avoid lingering when the area becomes unsafe.
After each match, identify one moment when better awareness might have helped. Perhaps you moved too late, ignored an audio cue, or entered an exposed area without checking your route.
Use that observation to guide your next match.
10. Common Map Awareness Mistakes
Checking the Mini-Map Too Rarely
You may miss useful information about your position, the safe zone, or your teammates.
Better approach: Build a habit of brief checks at sensible moments.
Watching the Map Too Much
Looking at the mini-map continuously can distract you from nearby activity.
Better approach: Check quickly, make a decision, and return your attention to the gameplay view.
Assuming Every Sound Means an Enemy Is Nearby
Sound cues can be useful, but they may not provide an exact position or complete information.
Better approach: Combine audio with visual information and consider other possible explanations.
Ignoring the Safe-Zone Timer
You may be forced to take a risky route because you waited too long.
Better approach: Plan your movement before the deadline becomes urgent.
Running Without a Destination
Unplanned movement can leave you exposed and make it difficult to respond to threats.
Better approach: Identify your next location and a possible alternative before leaving cover.
Chasing Combat Without Considering Risk
Following gunfire or an opponent may pull you away from a useful position.
Better approach: Evaluate your equipment, position, and escape options before committing.
Ignoring Teammate Positions
Moving too far away can make coordination difficult in squad matches.
Better approach: Check your team’s position and communicate when you need to regroup.
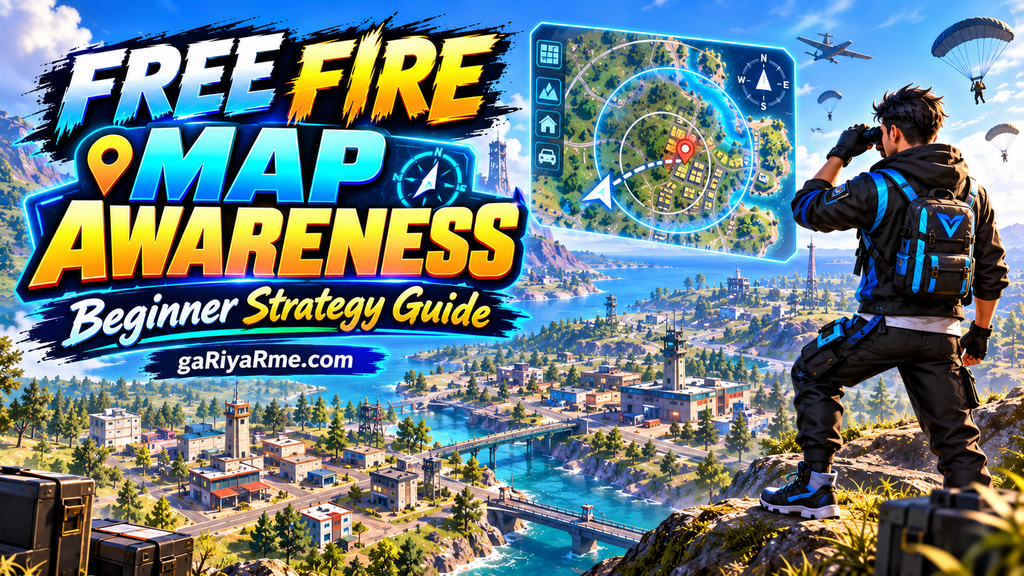
Map awareness is a skill that develops through observation, practice, and better decisions. In Free Fire, the mini-map, safe-zone information, sound cues, terrain, and teammate positions can all help you understand the situation around you.
Start by checking your location and the safe zone regularly. Plan your route before moving, pay attention to nearby activity, and avoid treating incomplete information as a guarantee.
Most importantly, combine awareness with good positioning, sensible combat decisions, and consistent practice. You do not need to predict every encounter. You need to notice useful information and respond thoughtfully.
Over time, these habits can help you navigate matches with greater confidence and make better use of the information available to you.
Frequently Asked Questions
1. What is map awareness in Free Fire?
Map awareness means understanding your surroundings and using information from the mini-map, safe zone, sound cues, terrain, and teammates to make better decisions during a match.
2. How often should I check the mini-map in Free Fire?
Check it briefly at useful moments, such as while moving between cover, planning a route, or reviewing the safe zone. Avoid staring at it continuously because you also need to observe the gameplay view.
3. Can the mini-map show the exact location of every enemy?
No. The information available depends on the current game mechanics and situation. Some indicators may provide clues about activity, but you should not assume that every opponent is always visible or that an indicator gives a permanent exact location.
4. How does the safe zone affect map awareness?
The safe zone helps determine where you need to move as the match progresses. Monitoring its position and timer can help you avoid rushed rotations and plan a more practical route.
5. Can sound cues improve map awareness?
Yes. Sounds such as footsteps or gunfire may provide useful clues about nearby activity. However, sound does not always reveal an opponent’s exact location, so combine it with other available information.
6. How can beginners improve map awareness quickly?
Start with three habits: check the mini-map regularly, plan your next destination before moving, and review the safe zone before engaging in a fight. Practice these habits consistently rather than trying to learn everything at once.
7. Is map awareness important in squad matches?
Yes. It can help you track teammate positions, coordinate movement, communicate potential threats, and avoid becoming separated from your team.
8. Is map awareness more important than aim in Free Fire?
Both skills matter, but they serve different purposes. Aim helps you control your attacks, while map awareness helps you understand the situation and make decisions about movement, positioning, and combat. Improving both can make your gameplay more balanced.
Related Free Fire Guides from gaRiyaRme.com
Leave a Reply